Creating a website for fun or to showcase your portfolio is vastly different if you want to rank on the first page of Google. You have to put in a lot of time and effort if you want to grow your organic traffic.
In order to do that, you need several tools to help you achieve your goals. Now, don’t worry, I’m not going to list down every tool out there like other articles just to add to make the number in the titles bigger to hook you.
I’m talking about the essentials—the free marketing tools you need to get started.
Here they are:
Any more than these are really nice-to-have’s.
I’ve ranked websites in the past without any of the paid marketing tools. Yes, they help a lot and make your life easier, but they are not needed.
Free Marketing Tool #1: Google Analytics
The first marketing tool you need is an analytics software that will help you track your performance online.
I mentioned this as an essential component every website should have.
Google Analytics is the most well-known analytics software out there. And the best part, it’s free. All you need is a Google or Gmail account.
If you don’t have one, you can easily create a Google Analytics account by following these instructions:
Step 1: Open the Google Analytics Website
Click on this link to open Google Analytics in another tab.
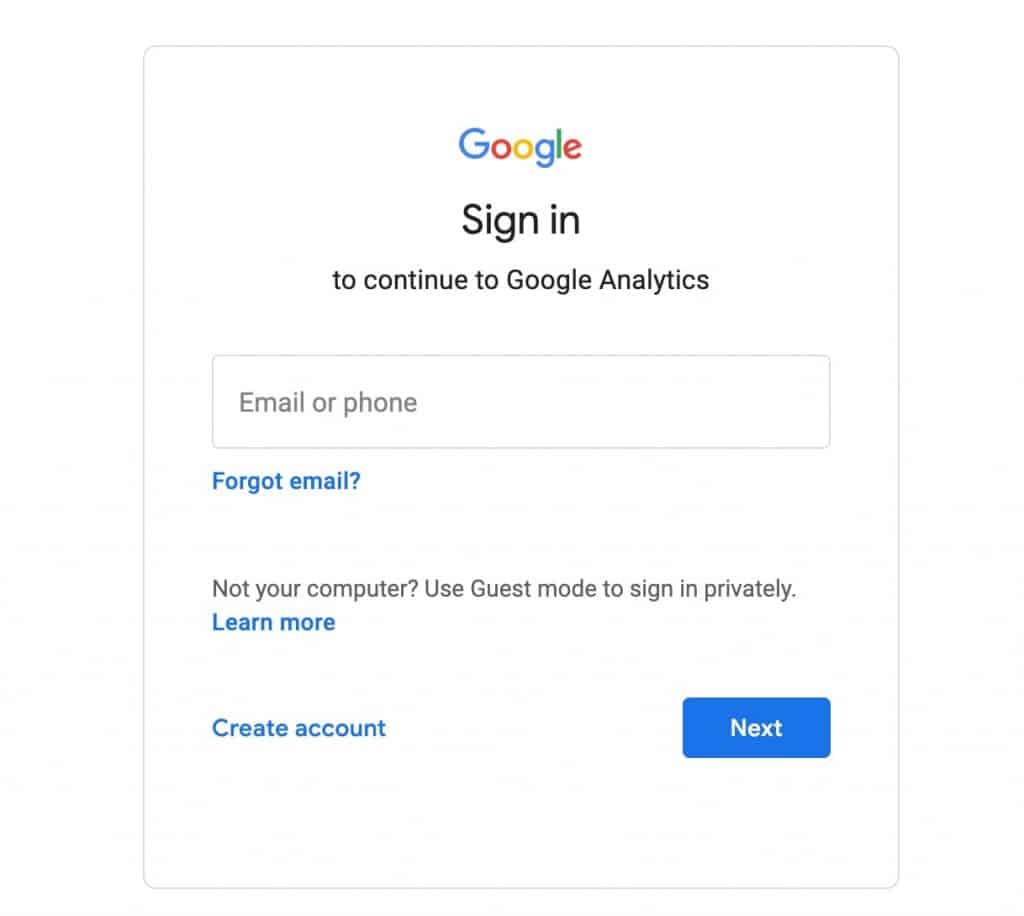
Step 2: Login to Gmail
You’ll be asked to login to your Gmail/Google account. Enter your email address and password here.
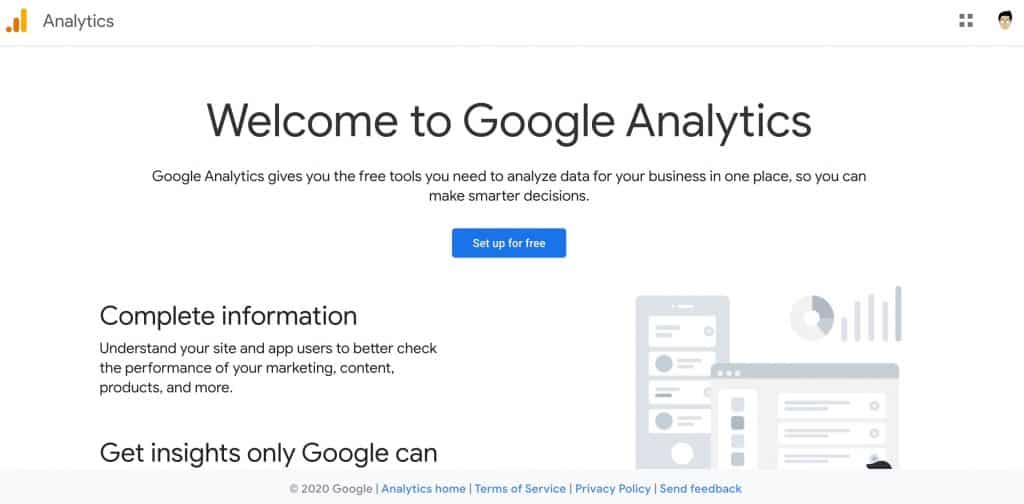
Step 3: Create an Account
If this is the first time you’re creating an account, you will be greeted with this screen. Just click on the button to Set up for Free then move on to the next step.
Step 4: Setup Your Account
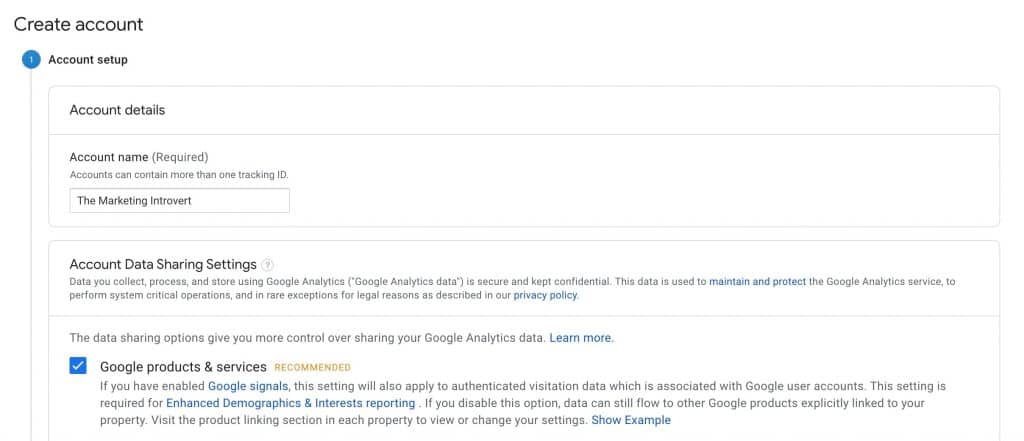
The next steps will be to set up your Google Analytics account. This is simple. Just fill-in the required fields.
First, enter the account name. This can be your company name or your brand.
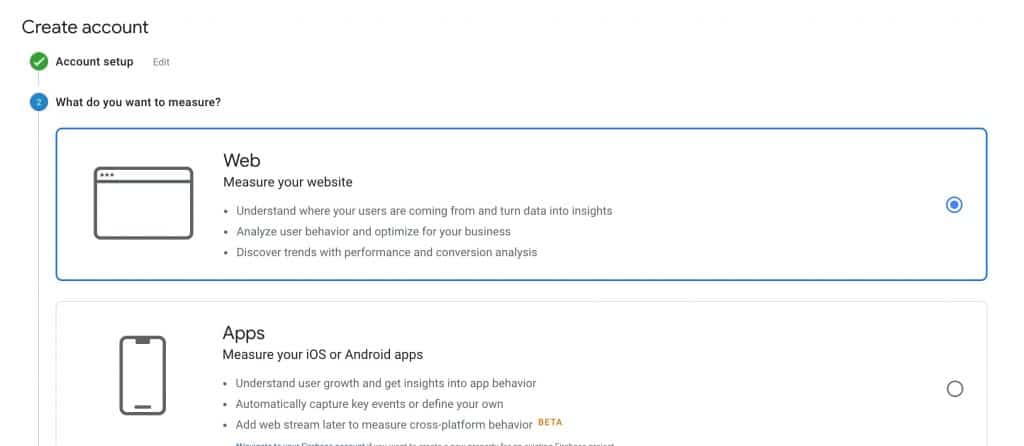
Next, select Web since we’ll be using Google Analytics to measure our website. There is a 3rd option, a web + app, but it’s still in beta mode. So there might be some bugs and issues with it.
Click on next at the bottom.
Lastly, fill-in the required details.
There are two things I’d like to highlight here:
- URL — if you’re using SSL, choose the https version before adding your site.
- Reporting Time Zone—choose which time zone you are in that way your reports will be accurate. Then, whenever you work with other people, especially if they are in another time zone, to mention this that way there’ll be accuracy in your reporting.
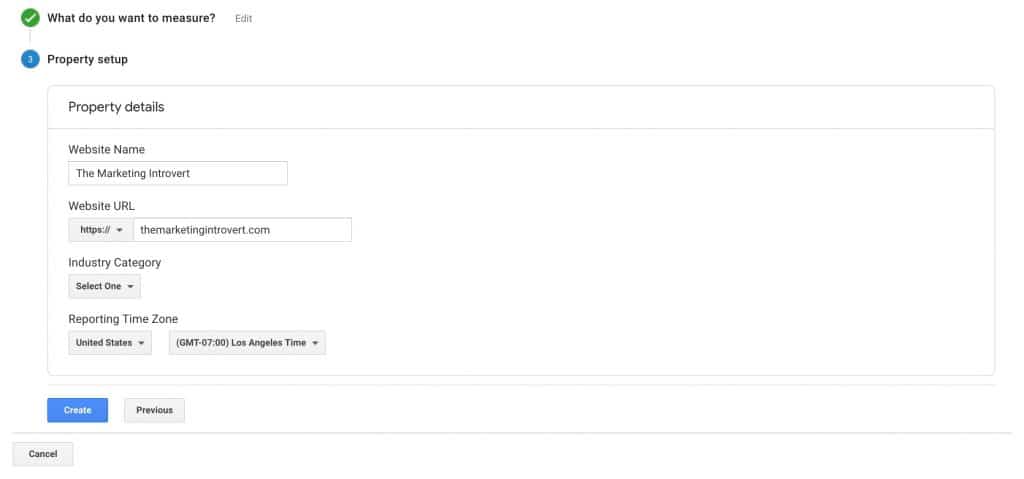
Once done, click on Create.
Step 5: Install Your Code
You’ll be asked to install this code to your website. But we’re not going to do anything else here.
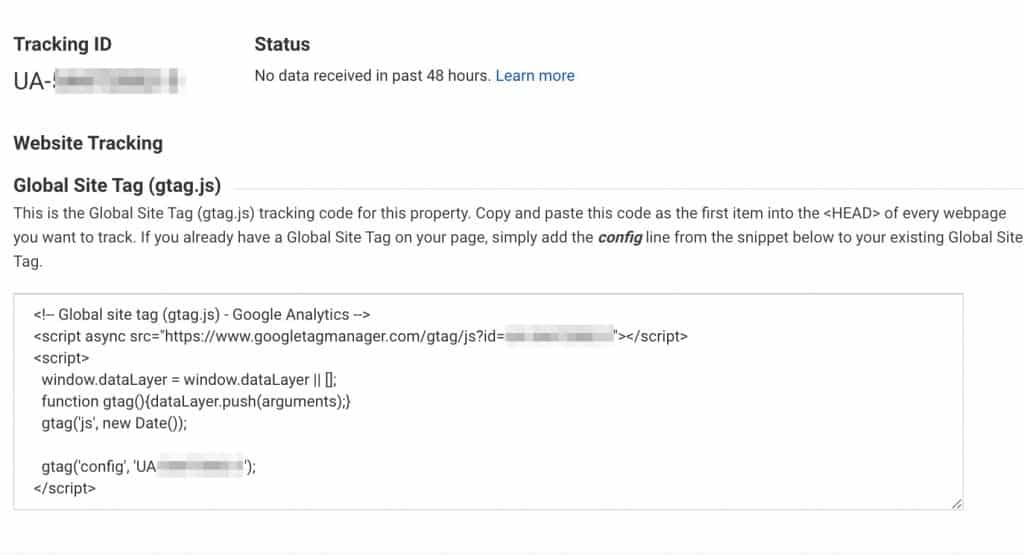
Instead, follow the steps I outlined here once you finished creating a Google Tag Manager account. The idea is to install Google Analytics inside GTM. Then, you install GTM on your website. This way, you don’t have to keep adding code snippets or tags to your website. You handle everything inside Google Tag Manager.
Free Marketing Tool #2: Google Search Console
This is the secret weapon of marketers.
If you are not using this, then you’re missing out a lot. For one website I’m handling, I grew it’s organic traffic by 76% using the data from Google Search Console. This data is not available elsewhere. That’s why it’s important that you set this up now.
As with all other data analytics tools, all data you collect is only moving forward. So, if you don’t create a Google Search Console account, wait for 2 years before making one, you will not have the ability to go back and see the data those 2 years.
If you already have one, then you can skip this step. Or better yet, find out how I use GSC to bring in an additional 7% increase in traffic using this post-publish workflow.
Step 1: Open Google Search Console
Click here to open Google Search Console in another tab.
You’ll be asked to login to your Google account.
Step 2: Add Your Domain
Once you’re in, you’ll be greeted with a screen that looks like this:
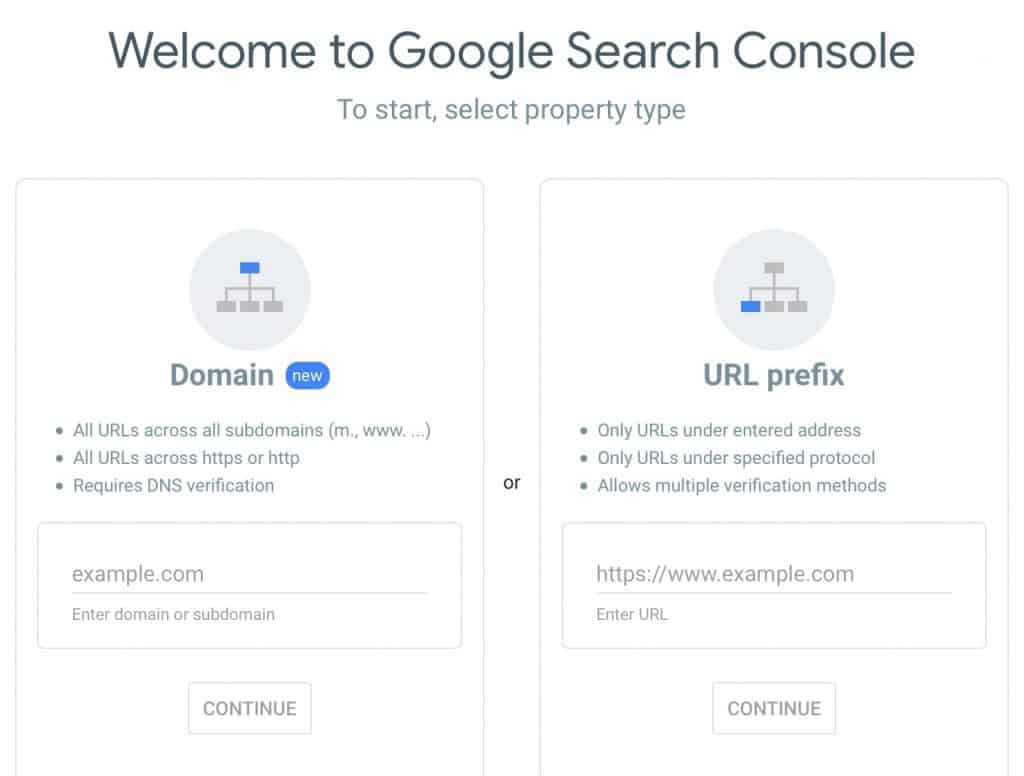
Enter your domain URL at the left-hand column (Domain property).
Choosing the domain property as opposed to the URL prefix allows you to monitor and check the performance of your entire domain. For example, you might not have configured SSL yet, so your http://domain.com and https://domain.com have to be added individually in the URL prefix if you want to check their performance.
But if you choose the domain property, all of these will be aggregated in one view. This will make your life easier too.
Step 3: Verify Ownership
After entering your domain, you’ll be asked to verify your ownership by adding a DNS record to your domain provider. Don’t worry, this isn’t as scary as it may sound.
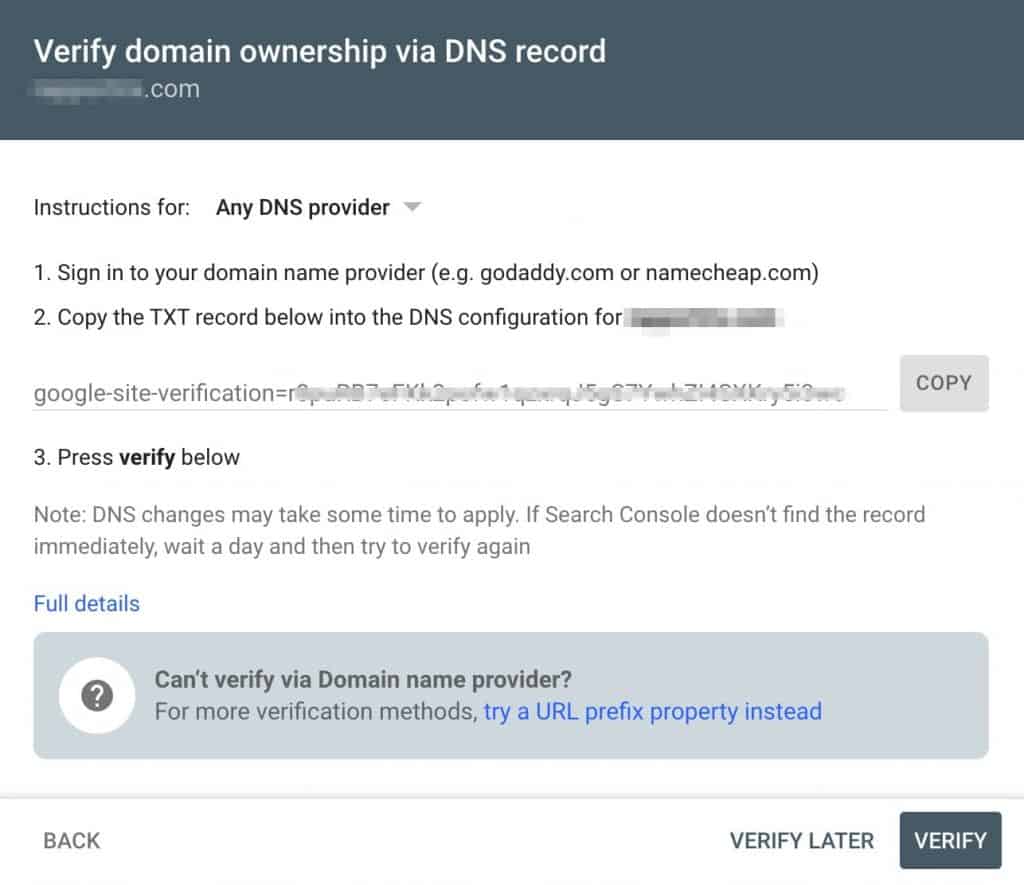
You can choose from the dropdown to find specific instructions for your domain provider. But here’s how it looks like inside GoDaddy.
Open GoDaddy then login to your account.
Find the domain you need to verify and click on DNS beside it.
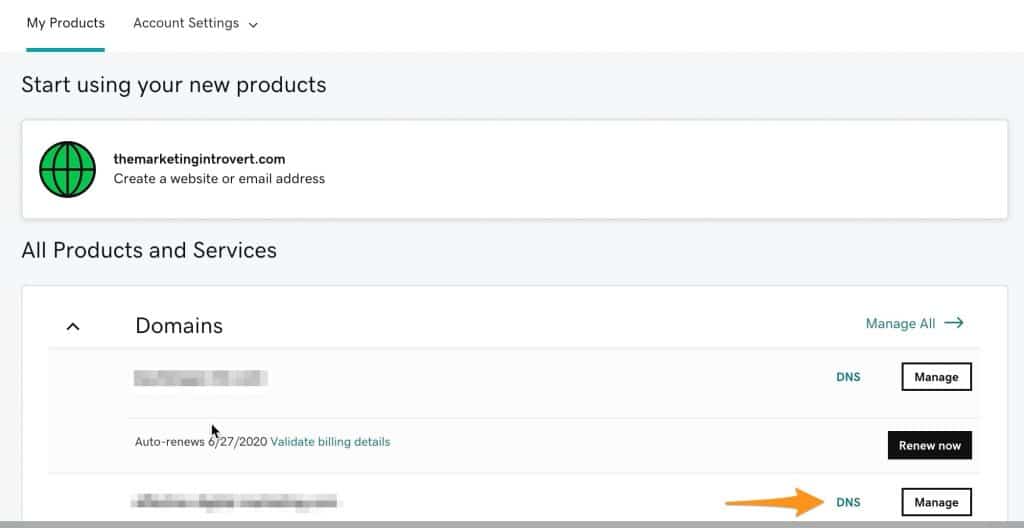
You should see your DNS records for that domain.
Scroll down a bit then click on the add button.
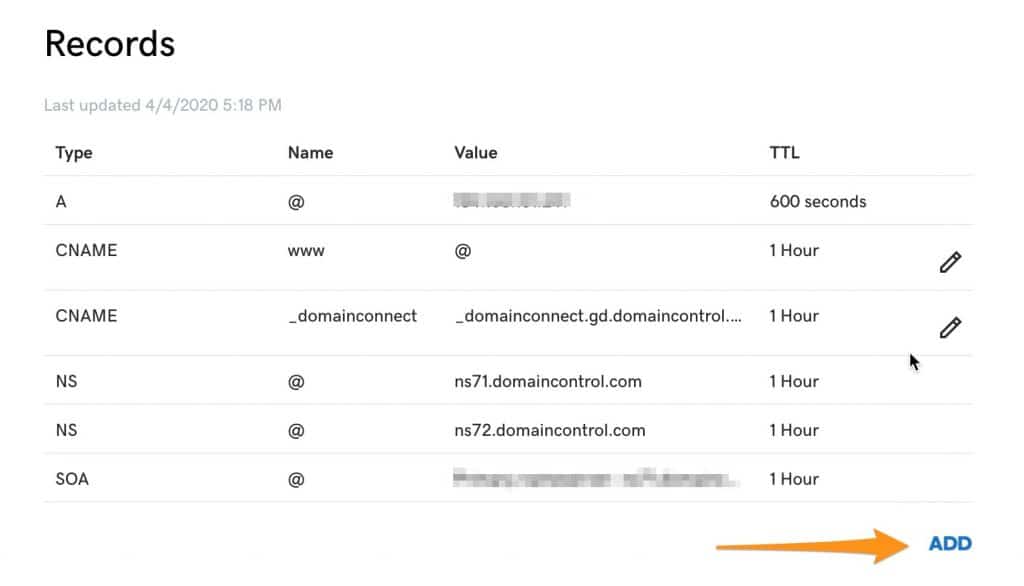
Just copy the TXT record given to you by Google Search Console. Click Save then you’re good to go.
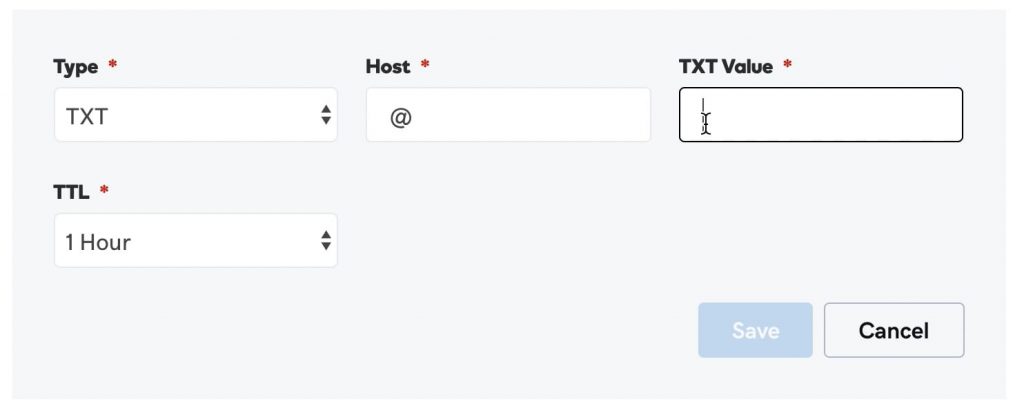
You’ll receive a notification saying it might take 24-48 hours before the changes take effect. But my experience is that this is almost always instantaneous.
Head back to Google Search Console and click on Verify.
Now, your Google Search Console will start collecting data for your website. If you’re starting out, this might not give you much data, but if you already have existing traffic and you’re just setting it up, come back to your GSC account again after a few days.
You can use the technique I described here to further grow your organic traffic.
Step 4: Integrate with Google Analytics
This one is a bonus step.
You integrate Google Search Console with Google Analytics allow you to merge the data in one place.
If you don’t already know, here’s a primer on these two tools and why they are distinct from one another:
- Google Analytics shows you which channels your visitors are coming from and their behavior on your website. This includes whether they stayed on certain pages longer, interacted with videos, or browsed through 5 articles before buying or setting an appointment. All these can be found inside Google Analytics.
- Google Search Console tells you how your page showed up on Google’s search engine results page (SERPs). You’ll find data on which keywords your pages are ranking for, what type (search appearance) did you show up like AMP, FAQ results, etc. You’ll also find data on your backlinks here.
When you integrate the two, you can now have an idea as to which exact keywords/phrases are driving traffic to your individual pages. And if you have configured goals properly with values, you will be able to prioritize which among these pages are more valuable than the rest.
Here’s how you integrate the two Google tools.
First, head on to Google Analytics then click on the gear icon to go to the Admin settings.
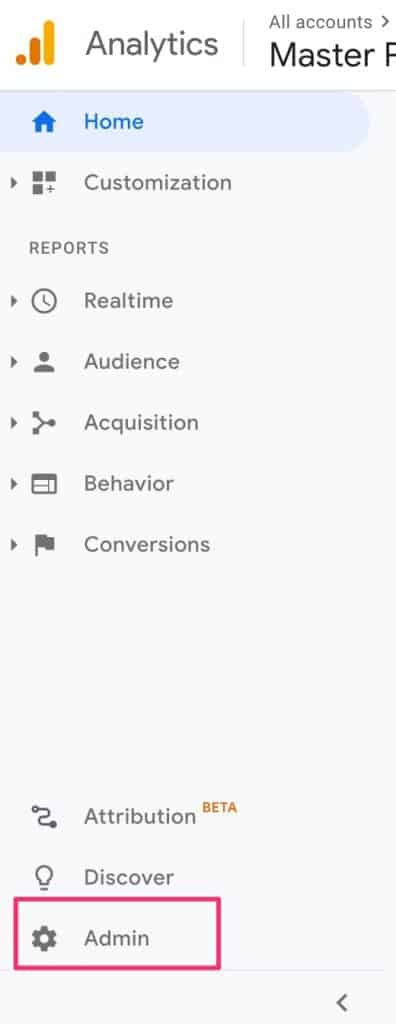
Once you’re there, click on the Property Settings in the middle column.
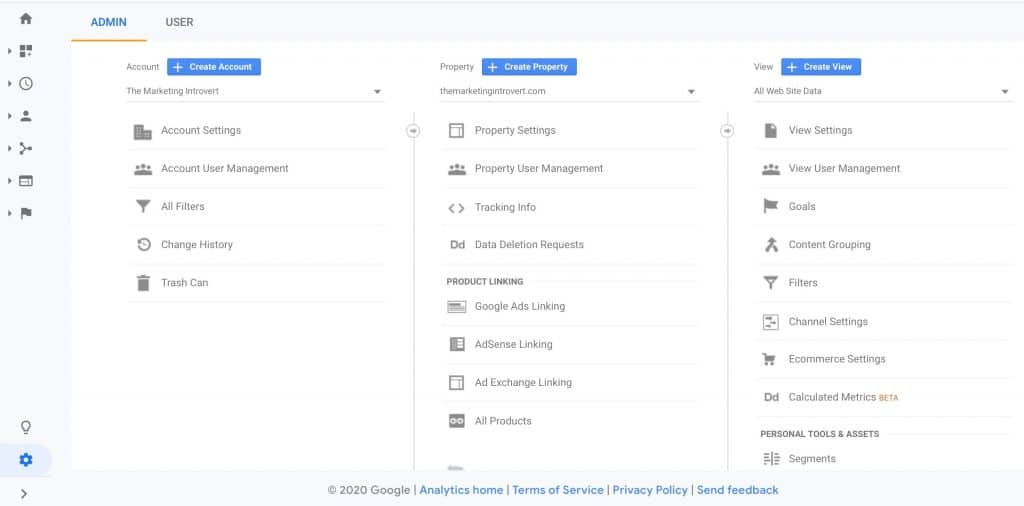
Scroll down a bit and look for the section for Search Console. Click on Adjust Search Console.
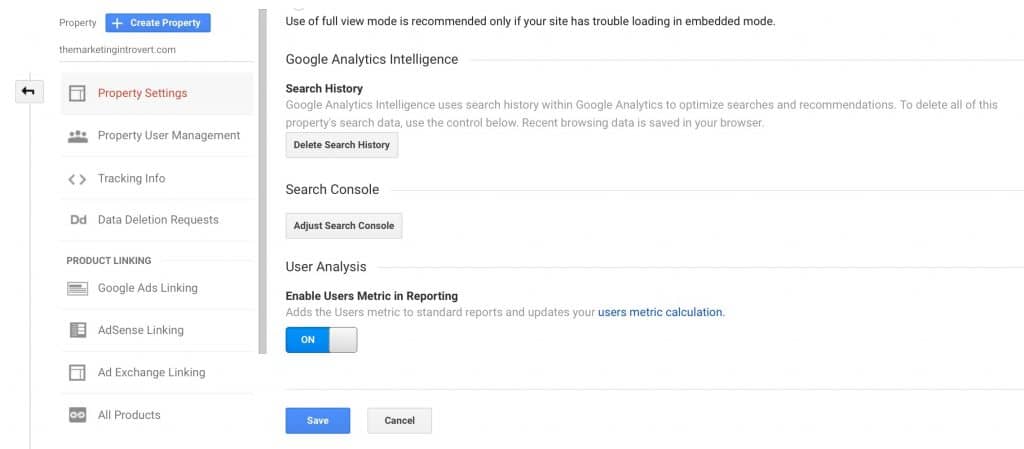
You’ll be asked if you want to link your GSC account. That’s what we want so click on Add.
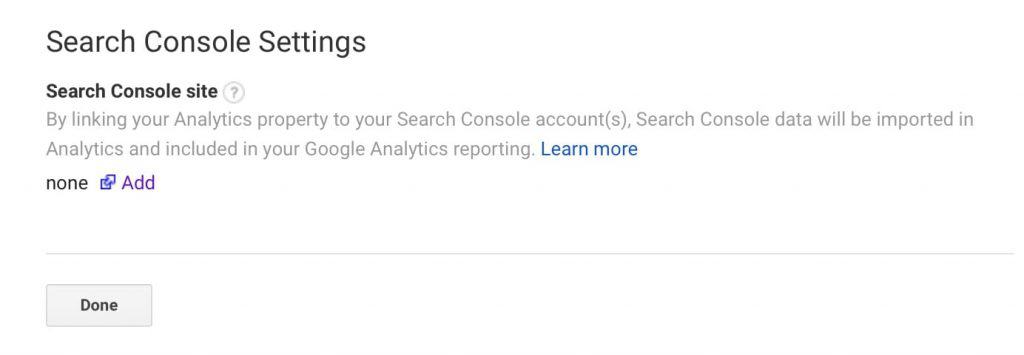
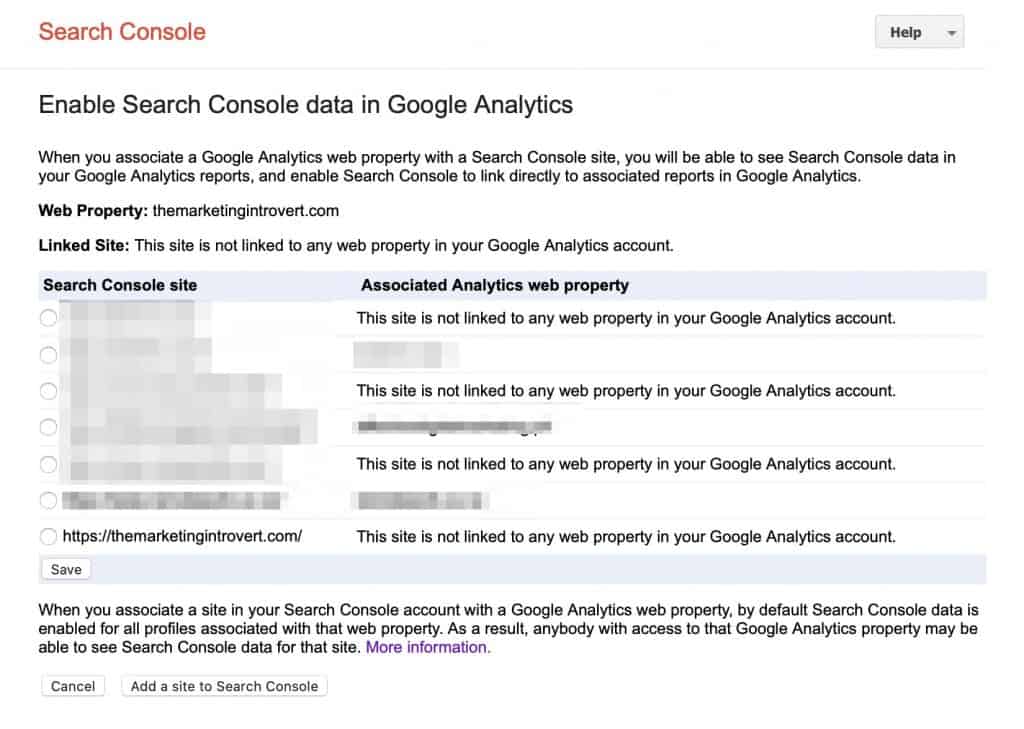
A new tab will open. Find the property you want to add to your Google Analytics account then hit save.
You’ll be prompted with a warning. Click OK.

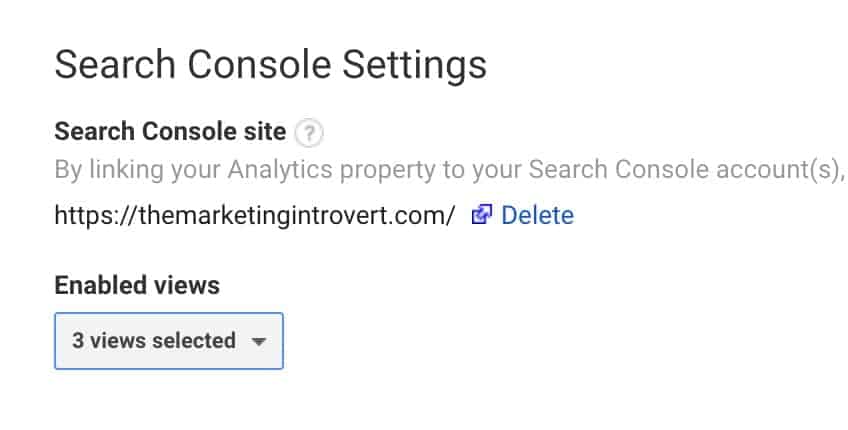
And you’re done. If you refresh the page, you should see something like this image below showing that you have successfully linked your Google Search Console with your Google Analytics Account.
Free Marketing Tool #3: Google Tag Manager
Google Tag Manager is probably one of the best marketing tools out there, primarily because it consolidates all the other tools in one place.
GTM allows you to install the code once on your website and you never have to deal with it ever again.
As digital marketers, we often play around with new technology.
Let’s say a new chatbot or messaging system comes out and you want to try it out, you would have to get the installation code, send that over to your IT, wait for a few weeks it gets installed, then find out that it was done wrong. Months pass and you haven’t even begun testing the tool.
Or if you’re more adept at code, you tinker with it yourself and add it directly to your website.
But people like these are rare.
Most marketers I met aren’t as comfortable editing code on the website because they know it can easily break everything.
That’s why using a tag management software like GTM is a godsend. You install it once then handle all future code or software you want to add inside Google Tag Manager. Here’s a step-by-step guide for creating a tag for the most common marketing software.
Here’s what you need to do to get started:
Step 1: Create an Account in Google Tag Manager
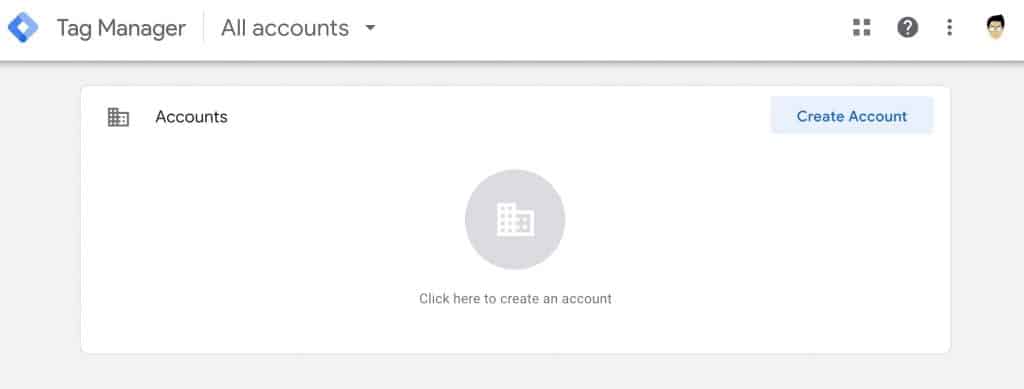
Head on over to tagmanager.google.com. Much like the earlier process, you’ll be asked to login to your Gmail account if you haven’t already. After that, you should see the account setup screen. Click on Create Account to get started.
Step 2: Complete the Necessary Details
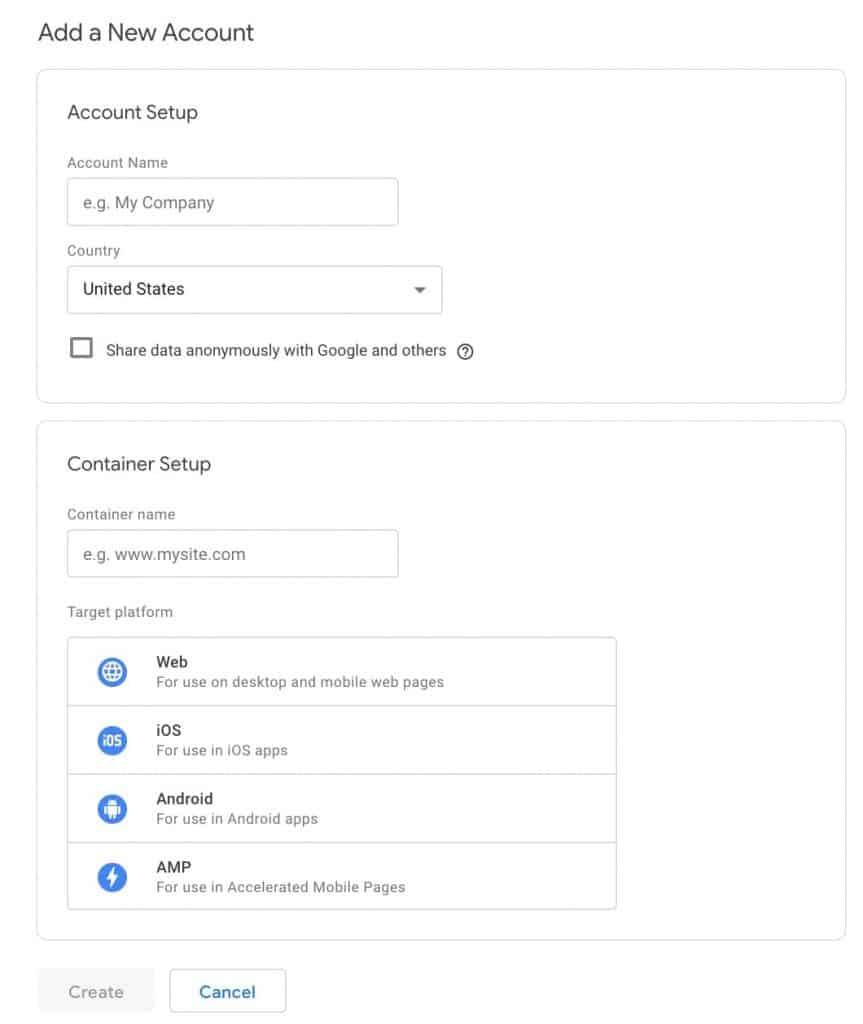
Next, complete the details here, much like how you did in the Google Analytics setup.
For the account name, add your company or brand name. For the container name, simply enter your domain, then choose web since we’ll be using this for our website.
Step 3: Agree to the Terms of Service
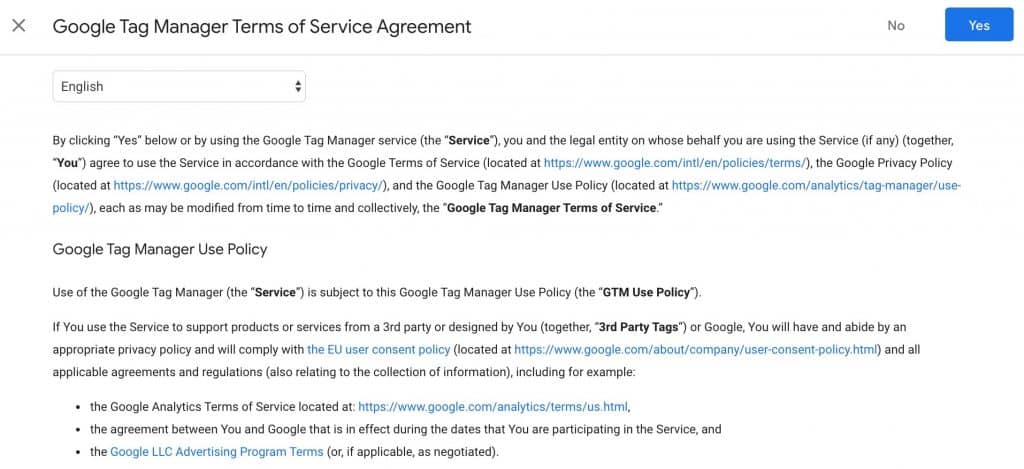
After clicking on Create, you will be prompted to agree on the terms of service. Click Yes.
Step 4: Install Google Tag Manager to Your Website
Lastly, you’ll see a screen with two sets of code just like this below.
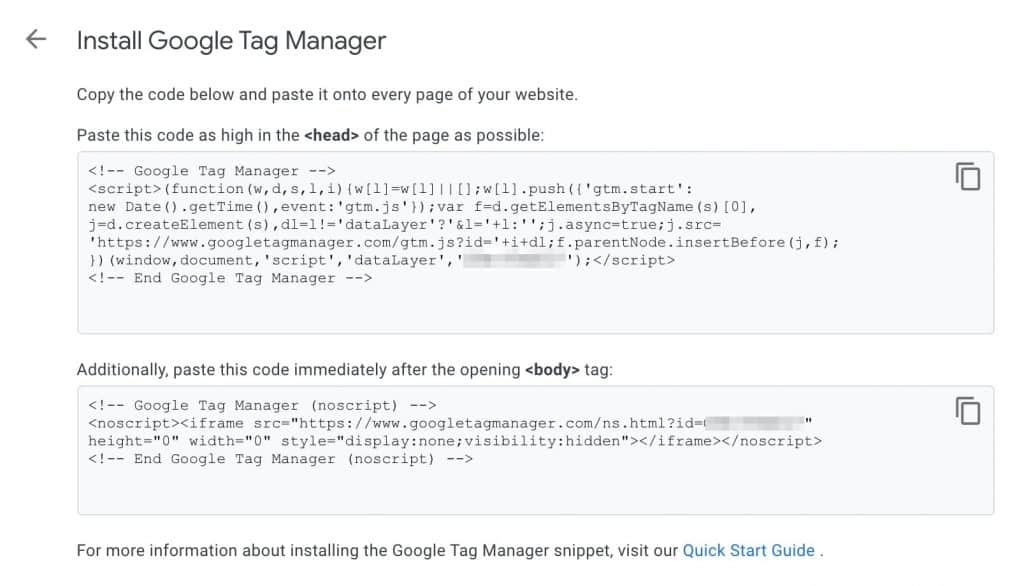
The next step is to install this code into your website. I created step-by-step instructions for how you can install Google Tag Manager into a WordPress website running on the Genesis Framework without plugins here.
You might also want to take a look at how you can add tags inside Google Tag Manager here. In this post, you’ll learn how to install Google Analytics to your website using GTM. I’ll also share how to set up the basic tags or code snippets you might use on your site.
Congratulations for making it this far.
Right now, you have just created accounts on the most essential marketing tools available. You not have the ability to gather data from your website and use this to beat your competition.
Just remember that creating accounts is the easy part. You have to put in the time and effort to grow your website’s traffic.