Congratulations on installing Google Tag Manager for your website. You’ve now made your life as a digital marketer that much easier.
As you probably already know, GTM allows you to manage all your tracking tags in once place. These tags are the different code snippets that are usually added to your website by the different software providers you are using on your website.
That means instead of adding the tracking codes directly on your website or through plugins, which may affect your page load times, you configure these tags in Google Tag Manager instead. Another benefit of using GTM is you don’t have to rely on web developers in order to deploy new technology.
In this guide, I’ll share the basics of GTM and step-by-step instructions for how you can add tags in Google Tag Manager for the most common software/tool you might use.
- GTM Basics
- How to Create a Tag
- Google Analytics
- Browser Notifications (like Subscribers)
- Preview and Publish Your Tag
I’ll be adding more to this list in the future. GTM might be confusing for beginners, but you don’t have to be afraid of it. I’ll tell you everything you need to know in order to properly set up the most basic tags.
For now, let’s break down the basic components of a tag inside your Google Tag Manager account.
Google Tag Manager Basics
There are 3 parts inside GTM that you will be using frequently:
- Tags are the code snippets you want to add
- Triggers are events that cause your tags to fire
- Variables are reusable data that helps simplify how you use GTM
At its most basic level, you add a tag and a trigger to get started. The tags are deployed to your site and fire when the trigger conditions are true.
It’s easier to explain this using an example: let’s say you want to add Google Analytics to your website. Normally, you’ll add a javascript code to all your web pages.
The tag is the code from Google Analytics. The trigger is all pages on your site.
A Non-Technical Way to Understand How Google Tag Manager Works
In another post, I used the analogy of a bag.
GTM is like the bag that you take with you everywhere. In certain situations, you bring out the stuff inside your bag only when you need it.
If you’re planning to buy a coffee at Starbucks, you take out your wallet. If you are heading to your car, you bring out your keys.
That’s the same thing with Google Tag Manager. You put everything (all the code/software you want to use) inside it, but only use the contents when needed.
How to Create a Tag in GTM
This is always the first step when creating a tag. Once you’re logged in, click on the New Tag button.

Then, you will see a tag configuration screen. It will have 3 parts:
- Name of the tag
- Tag details
- Trigger

Don’t make this complicated. For the name of the tag, use the software name.
In the tag configuration, that’s where the variables come in. You’ll see how this is used in the examples below.
Lastly, the trigger is the condition that must be fulfilled before GTM will fire this tag.
Now that you know the basics, the next steps would differ depending on the code snippet you want to add.
How to Add a Google Analytics Tag
The first step in adding the Google Analytics tracking code is to change the name. I always go for GA Pageview which stands for Google Analytics Pageview. This is an important distinction so pay attention.
Next, click on the tag configuration and you will see a list of tags that are available. Choose the Google Analytics: Universal Analytics tag.

Remember what I mentioned about the name? If you click on the track type, you will see a bunch of options there. You don’t have to worry about those now, but I want you to know that there are different types of data you can track using Google Analytics that’s why it’s important to use the Pageview section of the name so you don’t mix it up in the future.
Remember, everything I’m sharing here (and in this website) allows you to scale later on.

The next part I want you to look at is the Google Analytics Settings. This is the part where you enter your Google Analytics Tracking ID.
The best practice is to create a variable here because later on, you might have to reuse it again. Then that would mean you’ll have to open up Google Analytics and search for it. It’s inefficient.
I want you to click on that then New Variable. You’ll now be taken to the variable configuration screen.

Enter a name for it. Again, I usually go with gaProperty, but you’re free to choose a name of your own. Just make sure you remember what it is. This is important because as your website grows, you might add more and more variables here. If you name it using variable1 or something similar, it will be impossible to keep track.
In the Tracking ID field, enter your Google Analytics Tracking ID. It will look something like this: UA-123456789-1. You can find this the property settings of your Google Analytics account.
Leave everything as is. Hit save. You should have something that looks like this:

The last step is to add the trigger conditions. Scroll down and click on all pages. Hit save.

In my example, you might notice another trigger called homepage. This is a custom trigger I made. You don’t have to worry about this for now since the Google Analytics tag should be firing on all pages anyway.
In my case, I use this for firing specific tags in the homepage or excluding it in my trigger conditions. That way, it loads everywhere else except on the homepage. We’ll get to this some other time. Just note that you ca configure those triggers in this page.
Once you’re done, head on over to the preview and publish section. This step is important. What you did is just add the tag inside GTM. It is not live yet. You can test and verify if it is working by using preview, then once you confirmed it’s working properly, hit publish.
How to Add the Subscribers Tag
Have you ever visited a website and your browser asks if you’d like to receive notifications from this site? It may look something like this.

That’s a technology called a browser notification. If you allowed that, you will receive notifications from the website. It’s a low friction opt-in. Instead of asking for an email address directly, they just click on that button and they can now receive notifications from you.
Here’s how to get started.
Step 1: Create a Subscribers Account
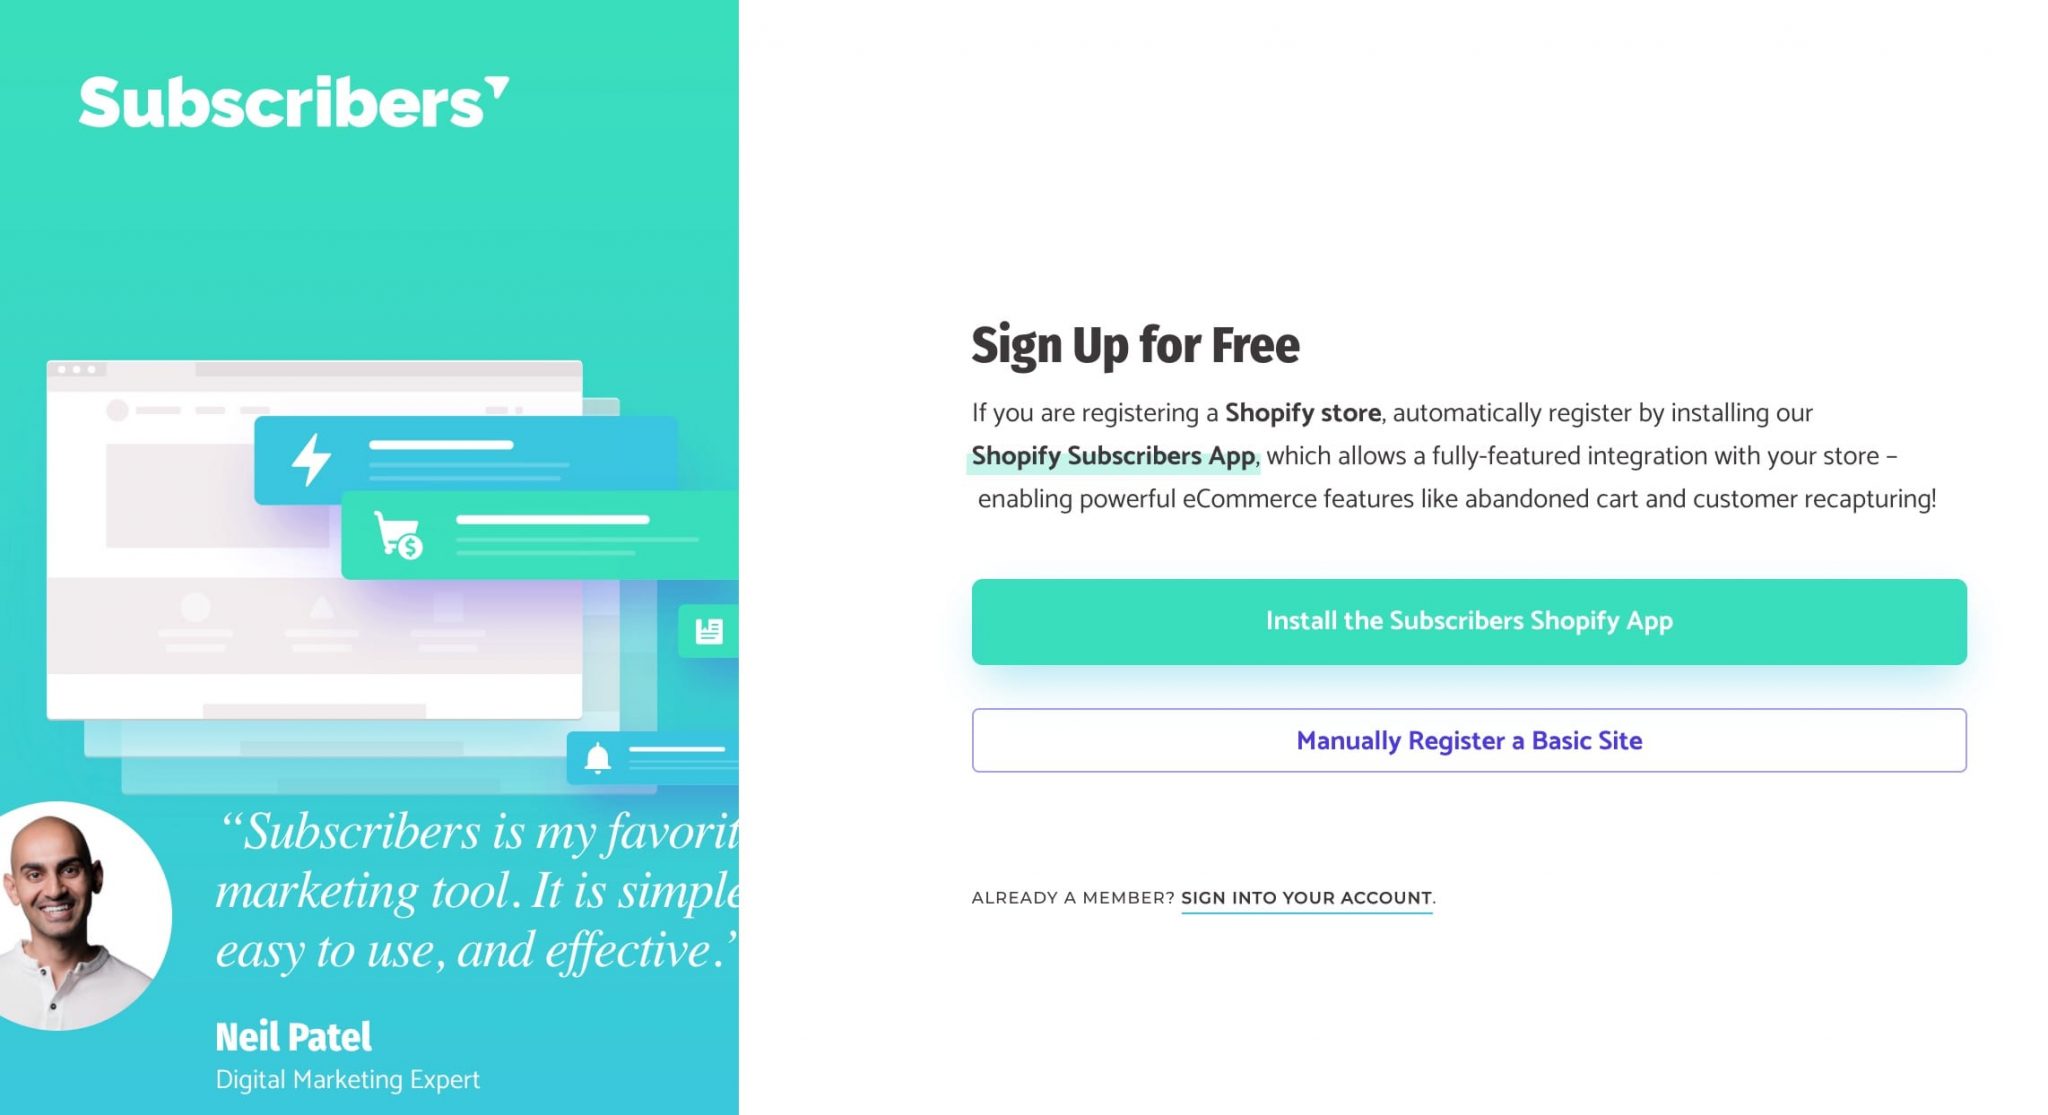
First, head on over to subscribers.com to create an account.

I’ll show you how to create and set up your account in Subscribers for a WordPress website. Click on Sign Up for Free. Next, choose Manually Register a Basic Site since you’ll be installing this on your WordPress site.
You’ll be asked for the basic details about your website.

Step 2: Install the Code
After creating an account, you’ll be asked to add an installation code to all the pages of your website (or at least to the pages where you want the notification opt-in to appear).
There are three steps involved:
- Install the code snippet
- Upload a file (optional)
- Verify. your installation

Scroll down the page to find the code you need to add to your pages. Since we are using GTM, you don’t need to add this directly to your WordPress pages.

Create a new tag in GTM as described above. For the tag type, choose custom HTML.

The next step is to configure your tag properly.
Paste the subscribers code snippet in the field. Then, head on over to the Advanced Settings.

Next, change the tag firing options from once per event to once per page.

Finally, add a trigger condition. Choose all pages here just like in the Google Analytics tag. This way, if a visitor lands on any of your pages, the notification opt-in will show up.
Once you’re done, head on over to the preview and publish section. This step is important. What you did is just add the tag inside GTM. It is not live yet. You can test and verify if it is working by using preview, then once you confirmed it’s working properly, hit publish.
Step 3: Upload the Service Worker File
If you read the installation instructions, this step is optional. Since it helps with the performance, then let’s do it. Click on Download Service Worker File then upload that to your root directory.

You can do this via FTP or through your cpanel.
Step 4: Verify Installation
The last step is to go back to subscribers and verify the installation of your code. If there are no errors, you should see a message that says installation verified.

Now, your visitors can opt-in to receive browser notifications on your site. You can use this as you would email marketing or a social media post. Think of this as another channel that can bring you additional traffic.

Preview, Publish and Deploy Your Tags
At the top of your GTM account, you might have noticed different areas. At the right side, you will see two prominent buttons: preview and publish.

Preview Mode Inside Google Tag Manager
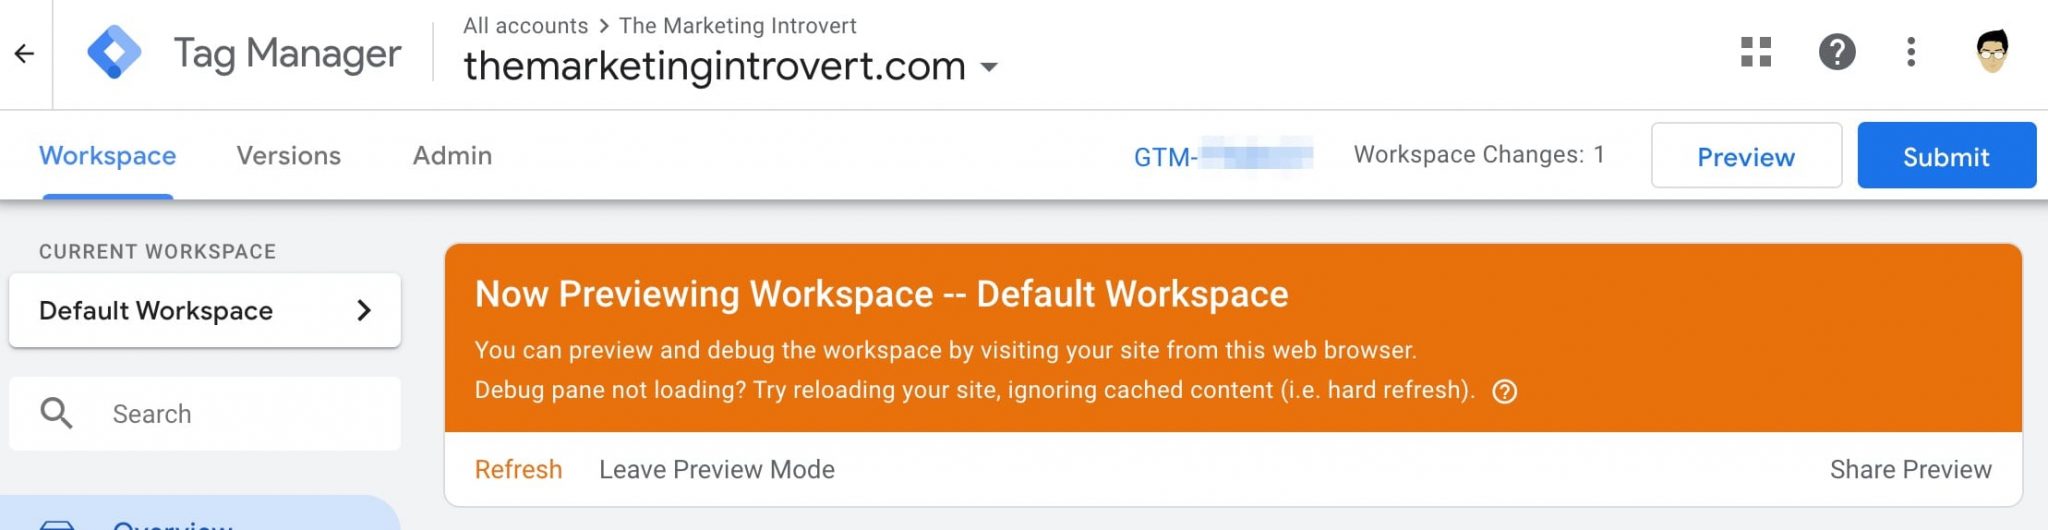
I suggest clicking on Preview first to check if your tags are working properly. Once you click on that, you will see a big orange notice saying you are in preview mode.
Open your website in another tab. In our case, let’s say I want to test the Google Analytics tracking code. Since this tag fires on all pages, i can open any page on my site. You will notice a section at the bottom portion of your screen. This will tell you which tags are firing and which aren’t.

In the example above, you can see that the GA Pageview tag is loading properly (along with other tags). This is important especially if you are using some advanced GTM tracking techniques.
Once you’ve confirmed that the tag is working properly, make sure you click on the leave preview mode inside GTM. Otherwise, every time you visit your website, that bottom half will always appear.
After that, click on publish.
Publish Your Changes
This is the easiest part. Just add a version name and a description. I always keep this simple. For example, I added the Google Analytics page view tag. I just enter “Added GA” in the name, then leave the description blank.
But if I made a bunch of changes, like turned off certain tags and added new ones, I list them down in the description.

Now, this is important. Don’t toggle the configuration. Always choose the publish and create version option. That way, you can always revert back to any version in one click should something bad happen.
Conclusion
The examples above are some of the basic tags or software you might add inside Google Tag Manager. There are other advanced and more useful ways you can use GTM though.
For example, you can track form submissions, button clicks, and other events inside GTM. But that’s for another time.
Are you using Google Tag Manager to handle your technology stack? Are there any tags or scripts you want to add to your website via Google Tag Manager? Let me know in the comments.