What do you do once you hit publish on that new blog post?
For some websites, they do nothing. For most websites, they share it on their social media and maybe their email list. A few websites, though, follow a specific content distribution strategy or post publish workflow.
I’m going to show you mine.
3 simple tactics.
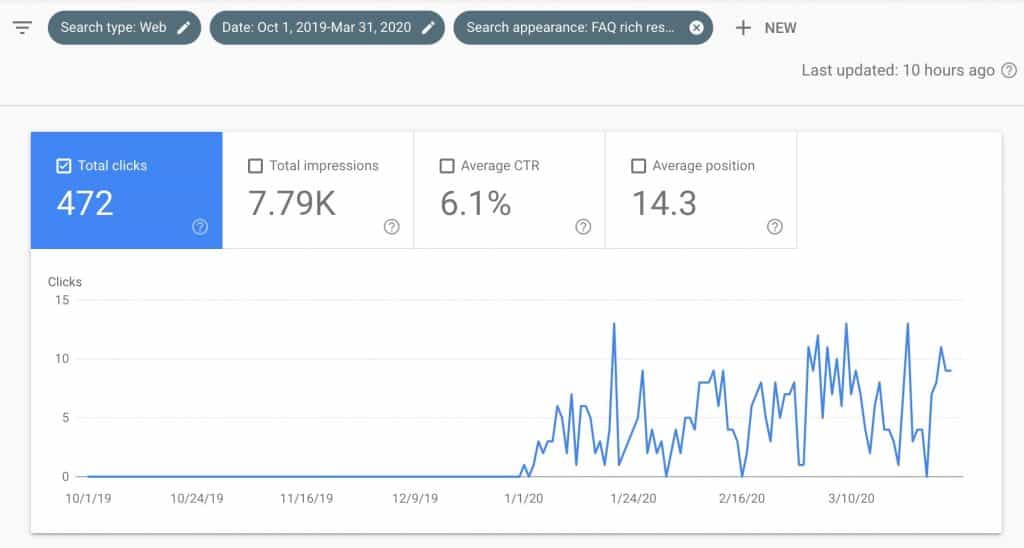
One tactic gave me an extra 472 clicks with an average of 6.1% click-through rate. And it only took me less than 15 minutes to do it.
In this guide, you’ll learn what these 3 post publish content distribution tactics are.
- Request manual indexing
- Add links FROM old articles TO the new article
- Add Schema Markups
But first, I want to clarify something first: I’m not going to talk about an entire content distribution strategy, although this is part of it. What I’m going to show you is a simple 3-step process that I used to gain extra traffic on my site.
Let’s get started.
Tip #1: Request Manual Indexing on Google Search Console
The first thing you do is get the URL of your new post then head on over to Google Search Console (GSC).
Once you’re in, find the correct website property. You don’t have to worry about this is you are only managing one website. If you don’t have one yet, you can find detailed instructions for how to create an account in GSC here.
Then, add the URL at the top then press enter. You should a message that says URL is not on Google.
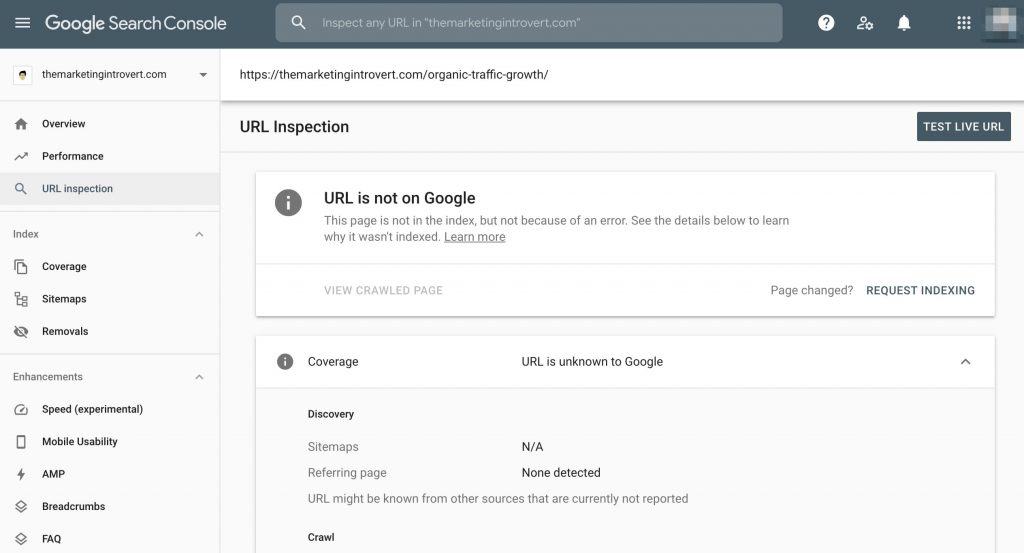
That’s okay. You just hit publish on your new post. Google hasn’t had time to find it yet. Be concerned if you entered a URL from a post you published a year ago and returned an error.
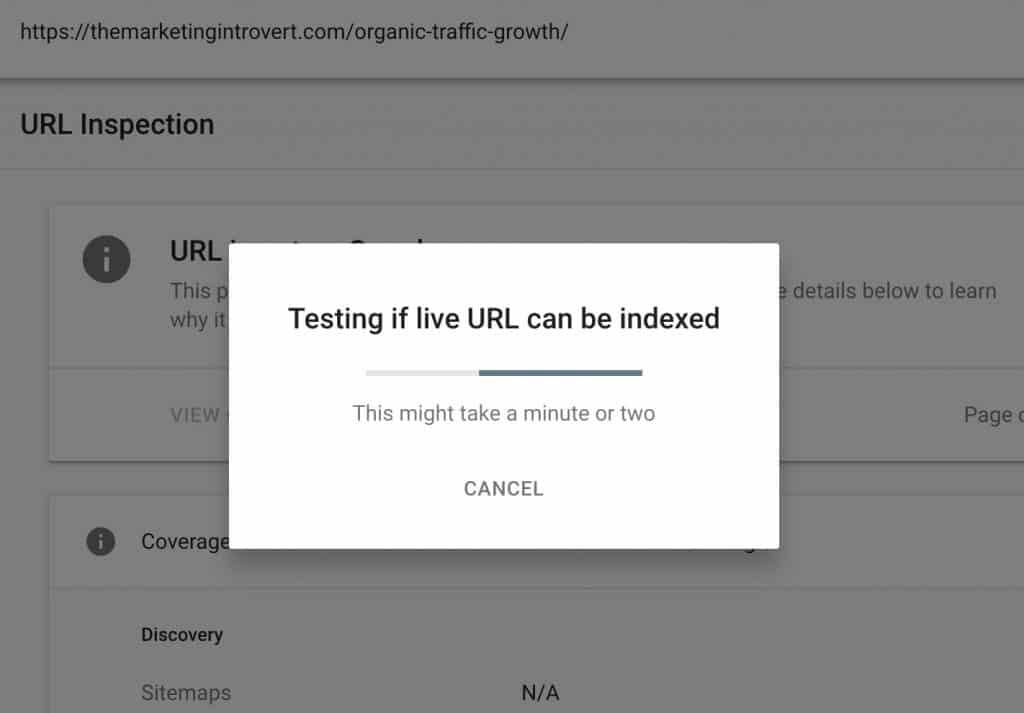
Click on Request Indexing to request Google to index your site. Google will do a quick test to see if the link can be indexed.
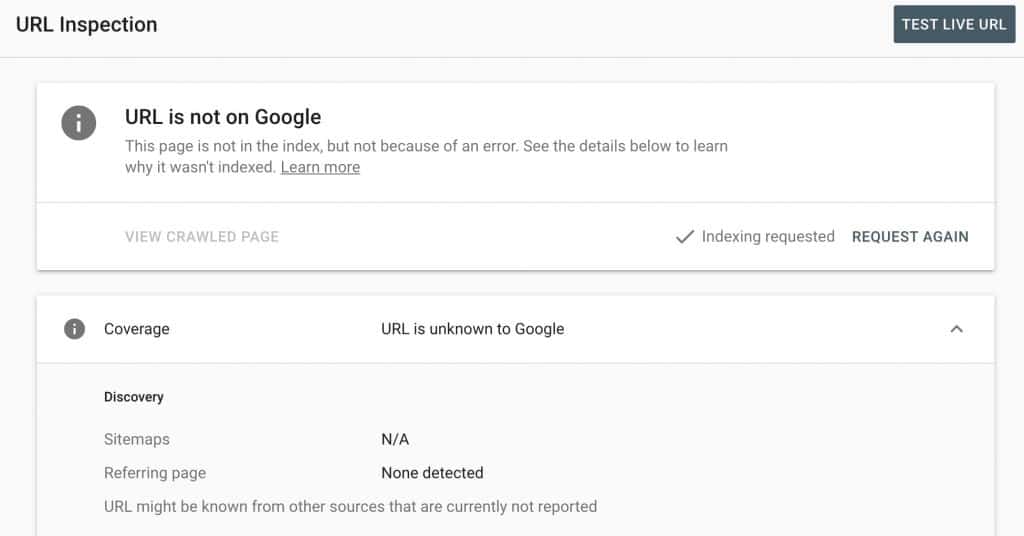
If there is no problem, you’ll see a “success” message that says Indexing requested.
Why is this important?
While technically not necessary, I find that it does speed up the indexing of the page.
Based on my experience, it takes a day or two for Google to index new posts. Again, this is depending on a lot of factors. But if you requested your site through this method, I find that it only takes a few hours before it Google finds it.
As mentioned, this isn’t necessary because Google indexes the web (and your website) automatically. Unless for some reasons Google can’t crawl your site, then that’s another problem.
If you didn’t already know, search engines like Google don’t actually show you the internet in real-time. What it does is show you the web pages in its index.
If your site isn’t included in the index, i.e. Google can’t crawl your site, you won’t get found.
And that means you won’t rank on Google, because to them, you don’t exist.
This step ensures your new page gets crawled and indexed faster and gives you higher chances of showing up on Google faster.
Tip #2: Add Links FROM Older Blog Posts TO the New One
The first tip helps with Google finding your content faster. This second tip helps your users find your new content faster.
Let me elaborate on that.
You already have some pages on your site that are constantly generating traffic—whether that’s on Google or social media or other channels.
But what about the new piece of content you just published?
Sure, you might have a distribution strategy in place (but statistics say you probably don’t). But that’s not enough.
Sharing your content on social media channels and your email list is a great way to get immediate traffic. But after the email gets sent or after the post, the traffic dies down.
That’s why smart marketers invest in creating high-quality content because it drives consistent organic traffic.
So if you have older pages that are constantly bringing you traffic, using this tactic will help your new post ramp up faster.
How to Generate Traffic to New Blog Posts Without Paid Ads
Perform a site: search using the keyword for the new article
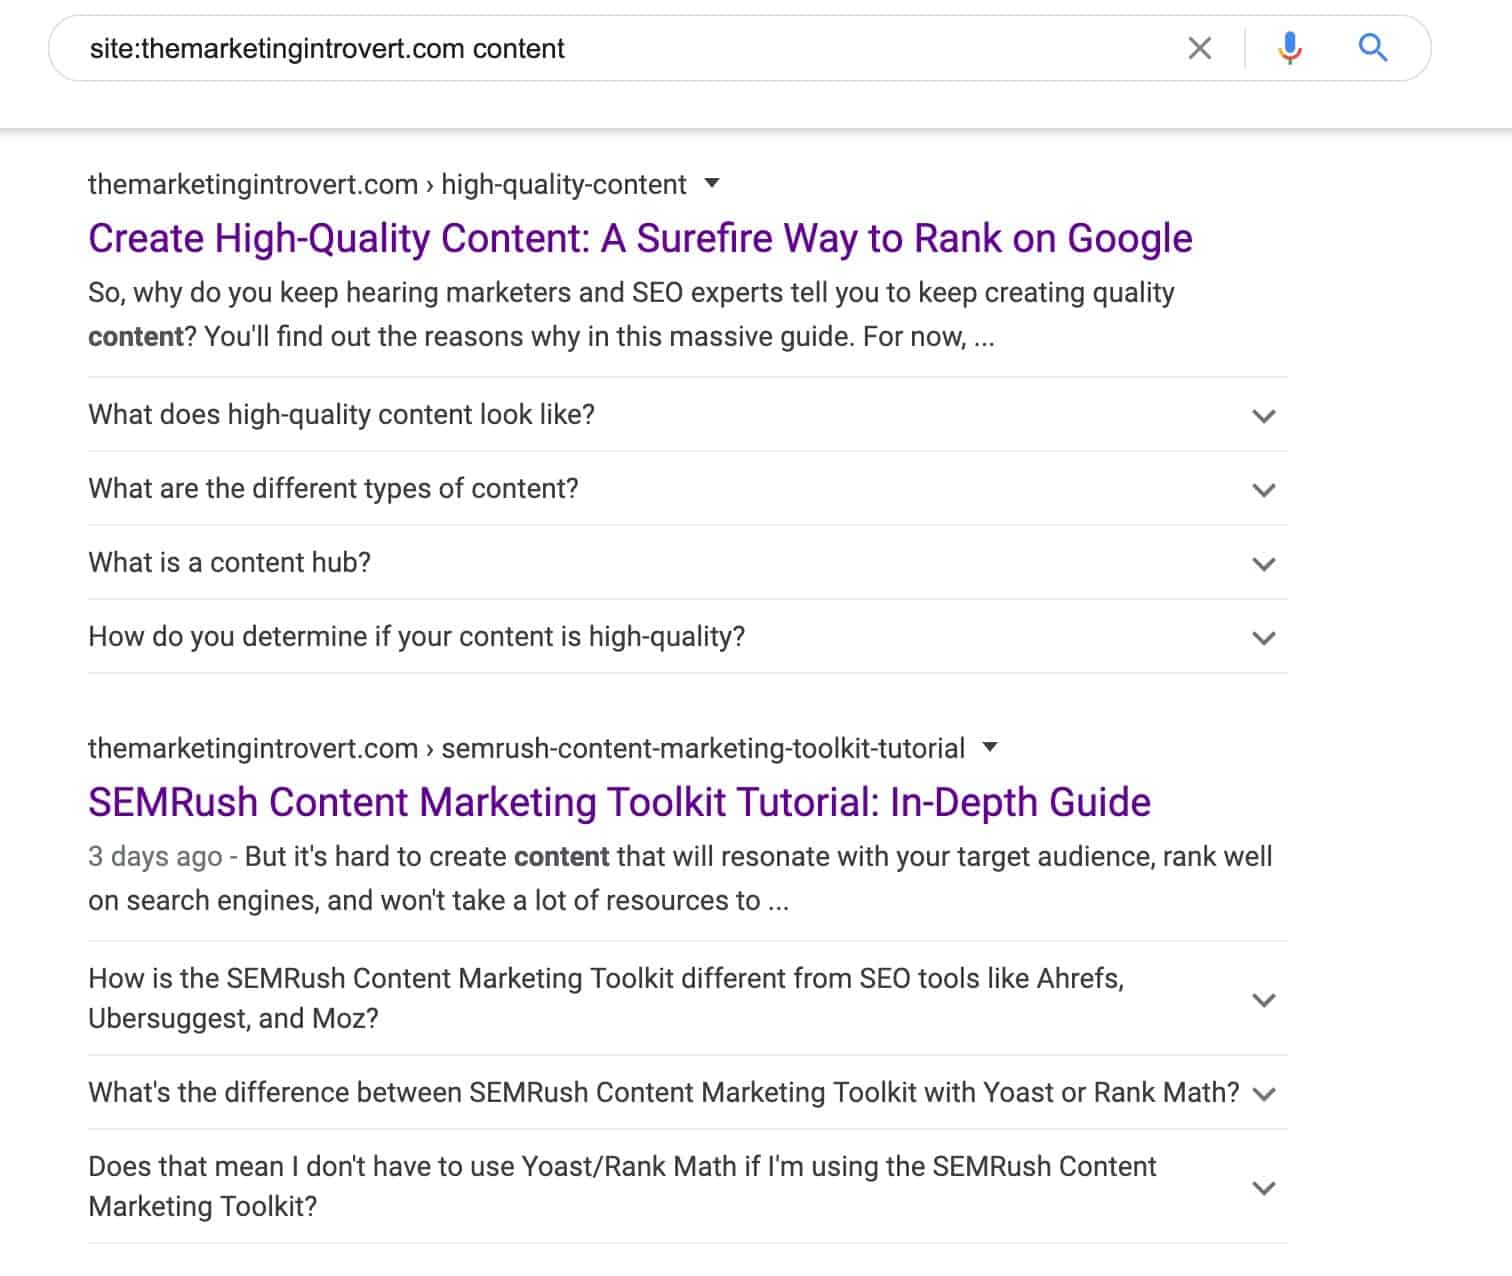
Open Google and type something like “site:themarketingintrovert.com keyword” without the quotes. Make sure you replace my domain and the keyword with the topic you just wrote about. Also, note that there shouldn’t be any space after the “site:” search operator. This will display all articles on your domain that uses that keyword.
Find posts where you can naturally add a link to the new article
Go through those articles that appeared in step 1 and find where you can naturally add a link TO the new blog post you just published. What I do is open all of them into a new tab and start reading. If the article is very long, I search for it in the browser (cmd+f on mac or ctrl+f on Windows) then type in the keyword. This will show me where the keyword was used.
Edit the older blog post, add the link, and adjust the copy if necessary
If it makes sense to add to this article, I edit the post in WordPress. Then, find where keyword/phrase you want to use as your anchor text then link it to the newly published post. Adjust the copy if necessary to make sure it sounds natural and not forced.
Update or re-publish the blog post
Once you’re done updating the blog post, hit update or publish again. This makes sure the link you added reflects publicly.
Repeat for all relevant articles on your website
Repeat the steps above for other relevant keywords and articles. For example, the newly published post is about “content distribution,” other variations can be “distribute content” or “syndicate content” or “share content.”
The objective of this post publish workflow is to make sure your NEW blog post gets more visibility.
Since your older articles will already have some consistent traffic across various content distribution channels, this tactic leverages that. Your target audience will see the link, and if they find it relevant, they click on it and visit your new blog post.
There’s a lot of benefit to doing this step from both the technical perspective and its effect on traffic.
But at the end of the day, it’s all about your users. Since you provided more resources (in the form of the new link) it helps them understand the topic more.
You gain more traffic, lowers your bounce rate, increases time on page—all signals to Google to increase your rankings.
Tip #3: Add Schema Markups
This is a game changer.
There are a lot of markups available but the ones I’m talking about are adding an FAQ and HowTo schema on the page.
I’m not sure if you noticed, but the screenshot earlier I shared are results from Google in this website and shows you extra drop-downs with some questions. Here it is again.
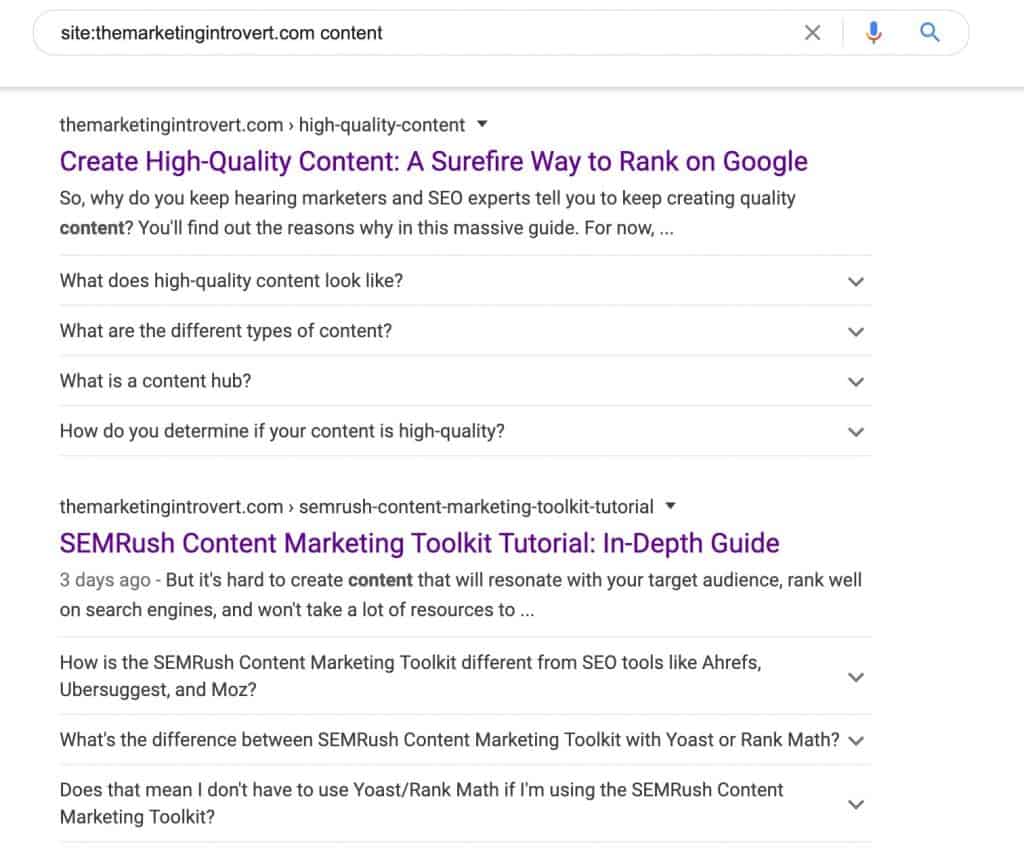
Those are FAQ schemas in action.
By adding them to each page you publish, assuming they are relevant, you increase your chances getting more traffic and eventually ranking higher.
Imagine a regular search engine results page (SERP). Normally, you’d see this on Google.
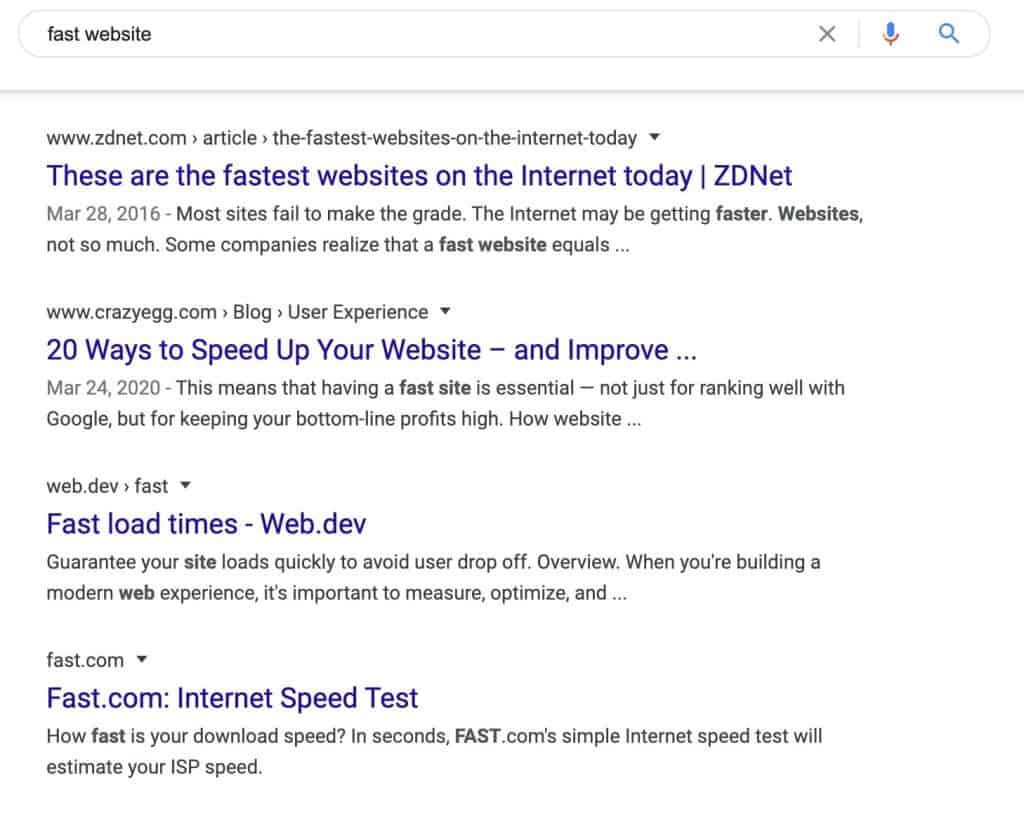
Plain. Boring. No one stands out.
But, if you added FAQ schemas or HowTo schemas, you have more Google SERP real estate. Meaning, you occupy several lines instead of the standard layout.
Again, this is just the start. Depending on your website, you should also take time to add other types like reviews, ratings, recipes.
Take a look at this Google SERP for dalgona coffee recipe.

Notice how some have pictures shown, while some don’t? What about the Star ratings? Some have them and some don’t.
That’s because they haven’t implemented schema markups.
I don’t know about you, but if I’m searching on Google and I found a results with 5 stars vs no stars, I’ll choose the one with 5 stars every single time.
Just remember, it’s not guaranteed that your results will show up with these. It still depends on the search term used. But it wouldn’t hurt to add them to your site.
Think about it this way. If you’re the only one in your industry is using it, then that gives you an immediate advantage over others who don’t.
Take a look at my example. 400+ clicks is not much. But that’s 7% of the total organic traffic increase I got. And what did I do? I added FAQ schema on my pages. And I’m adding more over time. That one single tactic I performed in January that took me less than 15 minutes, I’m still reaping the benefits.
How to Add FAQ Schema or HowTo Schema
You can do this in two ways: either through a plugin in WordPress, which is easier; or manually add the code to your page. Here’s an FAQPage generator that I found that works great.
Step 1: Install a Compatible Plugin
Depending on your WordPress setup, you might already be using one, you just don’t know it. If you’re using popular SEO plugins like Yoast or Rank Math, you already have this capability. If not, you can install the Structured Data plugin instead.
Step 2: Add the Schema to Your Page
After installing the plugin, go to one of the pages or post you want to add the schema markups to.
When you’re in the editor, you can type in “/faq” or “/how” without the quotes.

Depending on the plugin you installed, it will show up there. In the example above, it shows you the Rank Math plugin and the other plugin.
After choosing to add it to your page, you can just frequently asked questions and a short answer (if it’s an FAQ) or the steps (if it’s a HowTo).
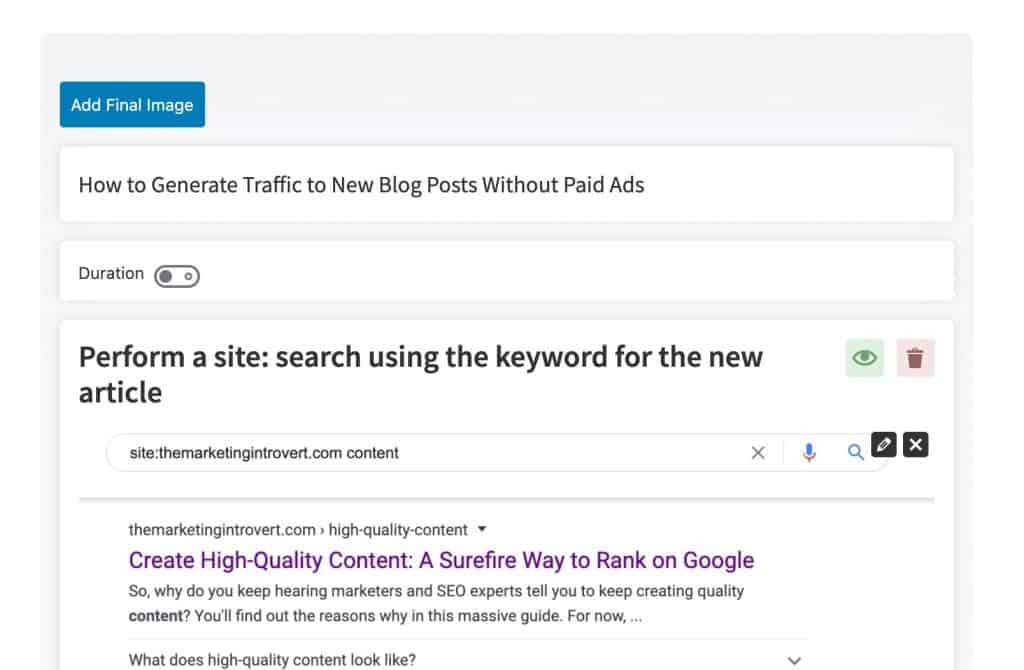
If you read through the section on how to generate traffic to new blog posts without paid ads, I used Rank Math’s built-in HowTo schema.
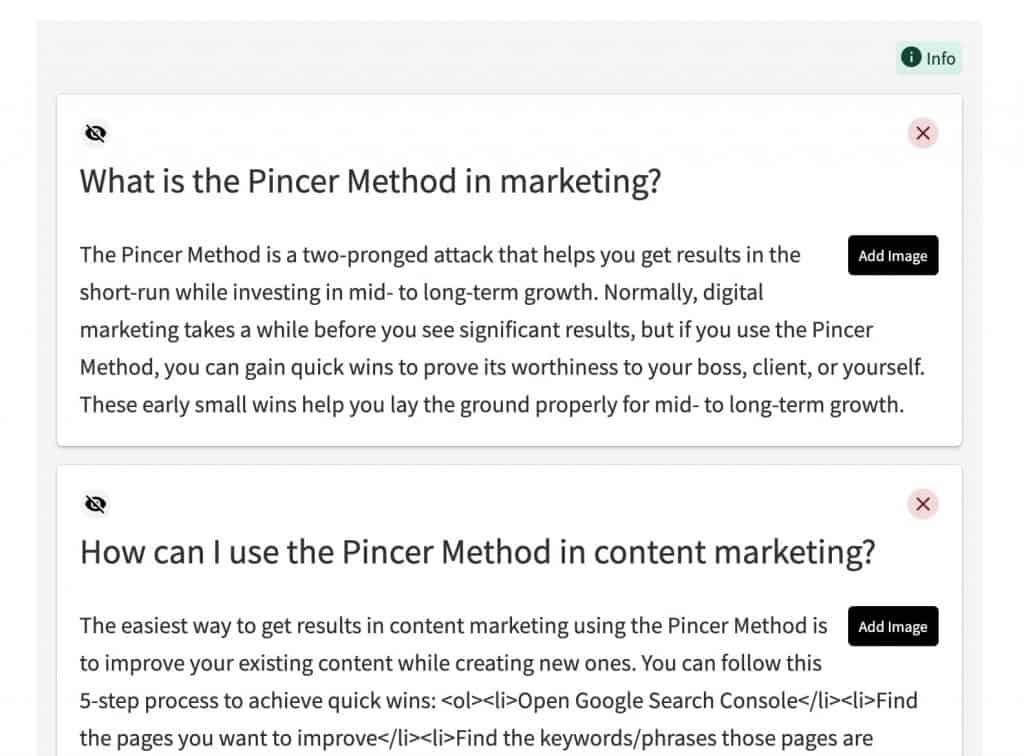
In my other post, I used Structured Content’s FAQPage schema.
If you look at it closely, there’s an “eye” icon on both. What that means is you can choose to hide or display them publicly. For example, in the Pincer Method article, I chose to hide them so the code is still there and readable by Google, but it’s hidden from users.
Take note that there are limitations to these schemas. There are do’s and don’ts as well. For example, there can only exist one HowTo schema on a page.
For the FAQs, it has to be a question and answer type where you, the publisher, creates the content. It cannot be user generated, like in forums. You need another schema for that.
Step 3: Publish
After adding your FAQ or HowTo schemas, make sure you hit publish/update.
Step 4: Double-check
The last step is to get the URL again, then head on over to Google’s Structured Data Testing Tool.
Enter your URL there to see if there are errors or not.
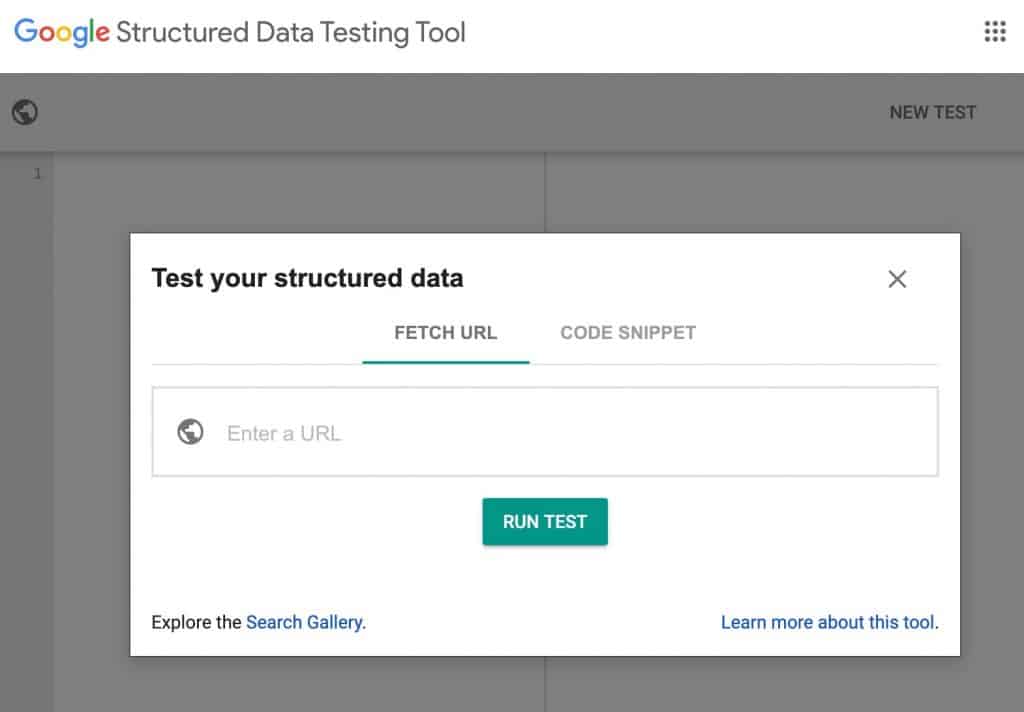
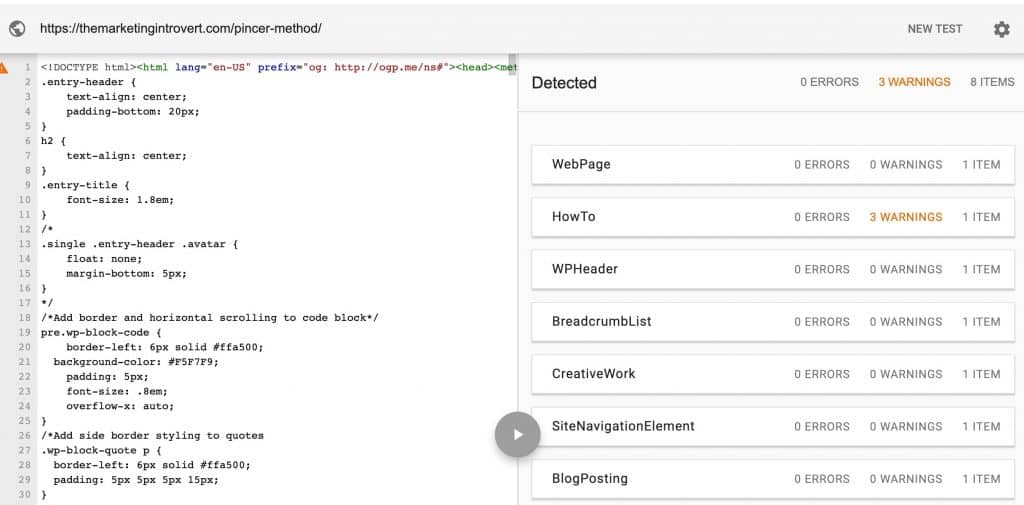
Sometimes, you’ll see some warnings, but that’s okay.
What you want to be mindful of are the errors. If there are, that means the code is invalid or something is wrong. If you don’t fix that, that page won’t be eligible to display the structured data you just added.
Conclusion
After you create content, don’t just hit publish and pray for traffic to come to you.
Yes, you can utilize email marketing and social sharing. You might also use paid distribution as part of your overall content marketing strategy.
But don’t forget to do these 3 tactics first.
They are all free and will work for you for a long time.
Small amount of time invested, higher traffic that continues to grow over time—now that’s a good investment.
Are you using these content distribution tactics? Let me know if I missed any.